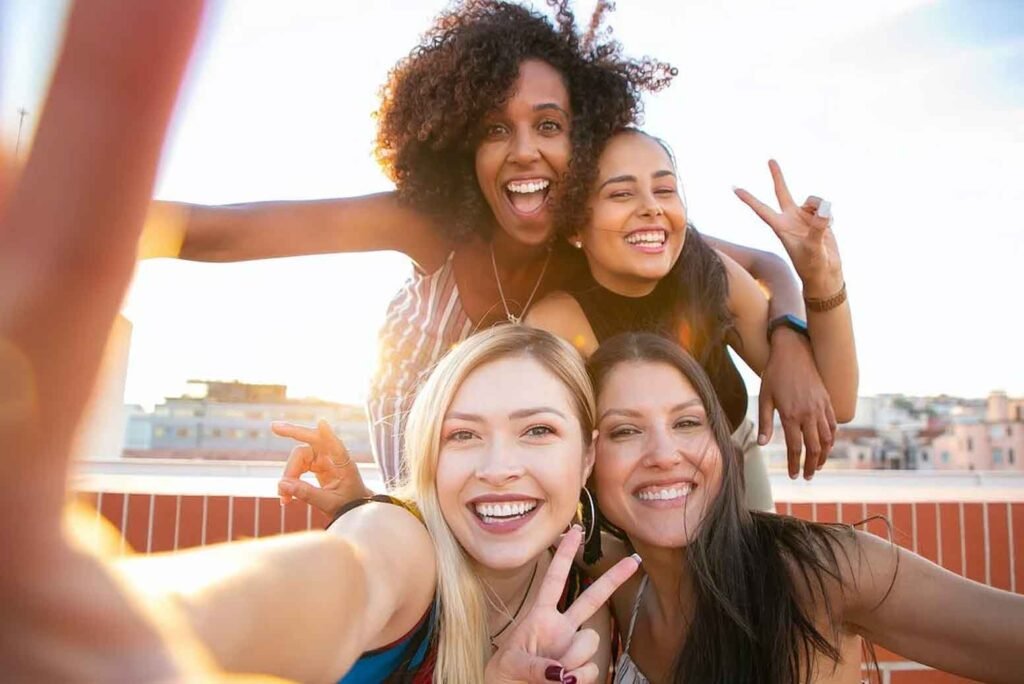
Outdoor self-portraits can be a fun and creative way to capture your personal style and mood in a natural setting. Whether you’re an aspiring influencer, a traveler documenting your adventures, or just looking to take some great photos of yourself, mastering the art of outdoor self-portraits takes a bit of planning and practice. In this article, we’ll explore some tips and techniques for creating stunning outdoor self-portrait photography.
1. Choose the right location
The location you choose can make a big difference in the look and feel of your self-portraits. Look for places with interesting backgrounds or natural elements that can add depth and texture to your images. This could be a park with lush greenery, a beach with waves crashing in the background, or a city street with interesting architecture. Experiment with different locations to find the ones that work best for your style and mood.
2. Consider the time of day
The time of day you choose to take your self-portraits can have a big impact on the lighting and overall look of your images. As a general rule, early morning or late afternoon tend to be the best times for outdoor portrait photography, as the light is softer and more flattering. Avoid shooting in harsh midday sun, which can create unflattering shadows and highlights.
3. Use a tripod or stabilizer
Using a tripod or stabilizer can help you achieve sharp, steady shots without the need for someone else to hold the camera. This is especially important when taking self-portraits, as you need to be able to position yourself in the frame without moving the camera. A tripod or stabilizer can also help you get creative with angles and perspectives, as you can position the camera in ways that would be difficult to do by hand.
4. Experiment with different poses
One of the keys to great self-portraits is finding the right pose. Experiment with different poses and angles to find the ones that work best for your body type and personal style. Don’t be afraid to get creative and try out different poses or expressions. Practice in front of a mirror to get a sense of what looks good and what doesn’t.
5. Pay attention to the background
The background of your self-portraits can be just as important as the subject. Look for interesting backgrounds that complement your outfit or mood, but be careful not to choose backgrounds that are too distracting. A plain wall or natural landscape can work well as a simple and elegant backdrop.
6. Use natural light
Natural light is often the best option for outdoor self-portraits. Look for soft, diffused light that isn’t too harsh or direct. If you’re shooting in direct sunlight, try to position yourself in the shade to avoid unflattering shadows on your face. If you’re shooting in low light conditions, consider using a reflector or other lighting equipment to fill in the shadows.
7. Edit your photos
Editing can help you enhance the colors, contrast, and overall look of your self-portraits. Use editing software to adjust the exposure, saturation, and other settings to create the look you want. Don’t overdo it, though – aim for a natural and authentic look that still reflects your personal style.
8. Have fun and be yourself
Finally, the most important tip for creating great outdoor self-portraits is to have fun and be yourself. Don’t be afraid to let your personality shine through in your photos. Smile, laugh, and enjoy the process – the best self-portraits are the ones that capture your unique style and personality.
Tips:-
Here are some tips to help you master the art of outdoor self-portraits:
- Find the right location: Look for a location that has good natural lighting, an interesting background, and fits the mood you want to convey in your self-portrait.
- Use a tripod or stable surface: To ensure sharp and steady images, use a tripod or set your camera on a stable surface.
- Set up your shot: Use a remote shutter release or self-timer to take the shot. This will give you time to pose and compose your shot properly.
- Experiment with different poses: Don’t be afraid to try different poses and facial expressions. Move around and try different angles to find the most flattering and interesting shots.
- Use a reflector: If you’re shooting in harsh sunlight, use a reflector to bounce light onto your face and reduce harsh shadows.
- Pay attention to the background: Make sure the background doesn’t distract from your self-portrait. Look for a clean and simple background that complements your subject.
- Edit your photos: Edit your self-portraits to enhance the lighting, color, and contrast. This will give your images a more professional look and feel.
- Practice: The more you practice, the better you’ll become at taking self-portraits. Keep experimenting with different locations, poses, and lighting to find what works best for you.
- Have fun: Self-portraits are a great way to express yourself and have fun. Don’t take it too seriously and enjoy the process of creating beautiful images of yourself.
- Use a mirror or other reflection: If you want to include more of your environment in your self-portrait, try using a mirror or other reflection to capture both yourself and the surrounding scenery.
FAQs
- What equipment do I need for outdoor self-portrait photography?
You will need a camera (it could be a smartphone or a dedicated camera), a tripod or a stable surface to set up your camera, and a remote shutter release or self-timer to take the shot.
- What time of day is best for outdoor self-portrait photography?
It depends on the look you want to achieve. Generally, early morning or late afternoon is ideal as the light is softer and more flattering. However, if you want to create a dramatic and moody look, shooting during midday when the light is harsh could also work.
- How do I find the right location for my self-portrait?
Look for a location that has good natural lighting, an interesting background, and fits the mood you want to convey in your self-portrait. Consider whether you want a more natural environment like a park or a beach, or a more urban setting like a city street or alleyway.
- How do I pose for a self-portrait?
Experiment with different poses and angles to find what works best for you. Move around and try different facial expressions to convey different moods. Don’t be afraid to try different poses and angles until you find what works for you.
- How can I edit my self-portraits?
There are many editing tools available, such as Adobe Lightroom or Photoshop. Use these tools to enhance the lighting, color, and contrast to give your images a more professional look and feel.