Installing tiles can transform the look and feel of any space, be it your kitchen, bathroom, or living area. One crucial aspect of a successful tile installation is choosing the right tile glue and employing effective techniques. In this article, we will explore valuable tips and tricks to ensure a flawless tile installation, from selecting the appropriate adhesive to implementing smart application methods.

Choosing the Right Tile Glue:
The first step to achieving a flawless tile installation is selecting the appropriate tile glue. Consider the following factors when making your choice:
a. Tile Type:
Different tile types, such as ceramic, porcelain, or natural stone, have varying adhesive requirements. Ensure that the tile glue you select is compatible with the specific type of tile you are installing.
b. Substrate:
Take into account the surface you will be tiling on. Whether it’s concrete, cement backer board, or a wooden subfloor, the tile glue should be suitable for that particular substrate.
c. Environment:
Consider the environmental conditions the tiles will be exposed to, such as moisture, heat, or freezing temperatures. Opt for a tile glue that offers appropriate resistance to these elements.
Preparing the Substrate:
Proper substrate preparation is essential for a flawless tile installation. Follow these steps to ensure an optimal bonding surface:
a. Cleanliness:
Ensure that the substrate is clean, free from dust, debris, grease, or any other contaminants. A clean surface allows for better adhesion.
b. Leveling:
Check the substrate for any uneven areas or high spots. Use a leveling compound or self-leveling underlayment to create a smooth and level surface. This step is crucial for avoiding tile lippage and achieving a professional finish.
c. Priming:
In some cases, priming the substrate before applying the tile glue can enhance adhesion. Consult the manufacturer’s instructions or seek professional advice to determine if priming is necessary for your specific project.
Mixing and Consistency:
Properly mixing the tile glue ensures its effectiveness and reliability. Follow these guidelines:
a. Follow Instructions:
Carefully read and follow the manufacturer’s instructions regarding the mixing ratio, water-to-glue proportion, and mixing time. These guidelines may vary depending on the specific Concrete Repair you are using.
b. Consistency:
Achieving the right consistency is crucial. The tile glue should be smooth, free from lumps, and have a workable texture. Avoid adding excessive water, as it can weaken the adhesive properties.
Application Techniques:
Implementing effective application techniques is key to a flawless tile installation.
Consider the following tips:
a. Notched Trowel:
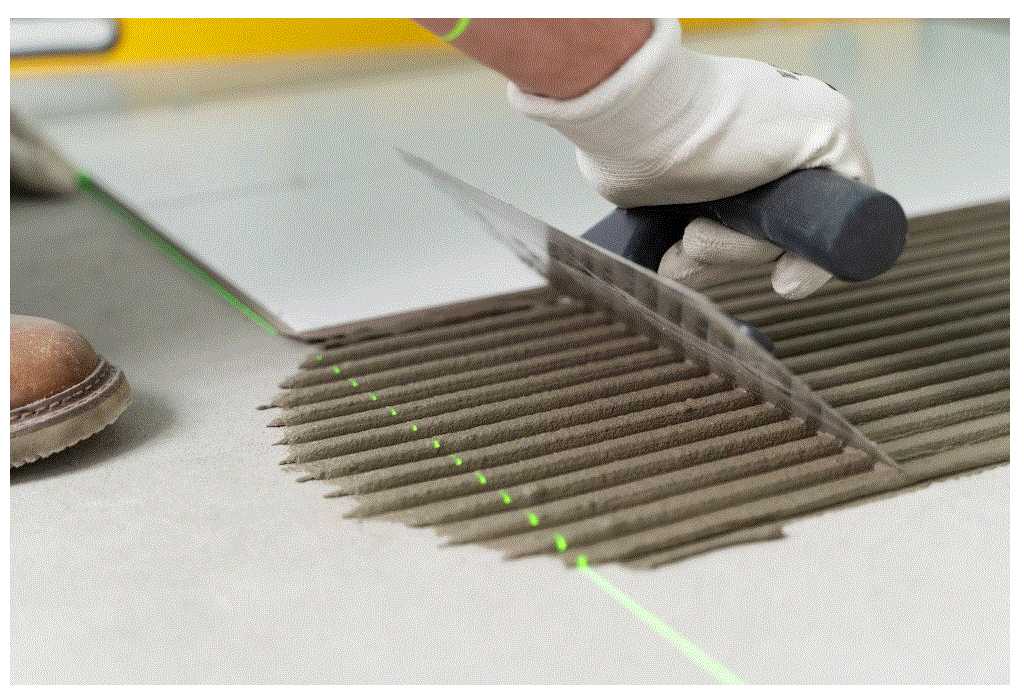
Use a notched trowel to apply the tile glue onto the substrate. The size and shape of the notches should match the tile size and type. This ensures proper coverage and eliminates air pockets.
b. Spread in Small Sections:
Work in small sections, spreading the adhesive evenly. This approach prevents the glue from drying out before you can lay the tiles, ensuring a strong bond.
c. Back-Buttering:
For larger or irregularly shaped tiles, apply an additional layer of tile glue to the back of the tile (back-buttering) to ensure complete coverage and a secure bond.
d. Tile Alignment:
As you lay each tile, gently press and wiggle it into the adhesive to ensure full contact and a level surface. Use tile spacers to maintain consistent grout lines and ensure a professional finish.
Timing and Adjustments:
Timing is critical during tile installation. Consider the following:
a. Open Time:
The open time refers to the duration the tile glue remains workable before it starts to dry. Follow the manufacturer’s instructions to know the open time and ensure that you lay the tiles within this timeframe. Working in small sections helps ensure that the glue doesn’t dry out before you can set the tiles.
b. Adjustments:
If you need to make adjustments to the tile position, do so promptly after placing it in the adhesive. Once the adhesive starts to set, it becomes more difficult to reposition the tile without compromising the bond.
c. Cleaning Excess Glue:
Regularly check for and clean off any excess tile glue that may squeeze up between the tiles. Using a damp sponge or cloth, gently wipe away the excess before it dries. This will save you time and effort during the grouting process.
Allow Sufficient Curing Time:
After the tiles are installed, it is crucial to allow sufficient curing time for the tile glue to set. Follow the manufacturer’s recommendations for the specific product you have used. Premature foot traffic or heavy loads can compromise the adhesive bond and lead to tile displacement.
Grouting:
Once the tile glue has fully cured, you can proceed with grouting. Ensure that the adhesive is fully cured and the tiles are securely in place before applying grout. This will help achieve a clean and durable grout joint.
Seek Professional Advice:
If you are unsure about any aspect of the tile installation process, it is always advisable to seek professional advice. Certified tile installers or experienced professionals can provide guidance and ensure that your tile installation is flawless and long-lasting.
Conclusion:
Achieving a flawless tile installation requires careful consideration of various factors, starting from choosing the right tile glue to implementing effective application techniques. By following these tips and tricks, you can ensure optimal adhesion, level surfaces, and professional results. Remember to prepare the substrate properly, mix the adhesive correctly, and work in small sections to achieve a flawless finish. With attention to detail and proper techniques, your tile installation will enhance the beauty and functionality of your space for years to come.


