Medical emergencies may happen unexpectedly, and knowing how to handle these situations with first aid can prevent injuries from worsening. Adequate first aid doesn’t just reduce the patient’s recovery time. It also gives time for emergency responders to get to the scene and administer the proper treatment.
Moreover, first aid saves lives. However, many people don’t know what to do during emergencies. For instance, cardiopulmonary resuscitation (CPR) can double or triple the survival chance of patients experiencing cardiac arrest outside medical facilities, yet 70% of Americans hesitate to perform it due to a lack of training.
Receiving training from licensed professionals is significantly better. But it still helps to get a gist of how to handle medical emergencies. In any case, here are some tips on giving first aid for common injuries and conditions.
10 Essential First-Aid Procedures
Again, the first step to providing first aid for severe injuries is to contact your local emergency number or have someone do it. Once you’ve confirmed that help is coming, you may begin.
- Treating sprains
Sprains occur when ligaments overstretch or tear. This injury is most common among physically active people. Symptoms may include pain, swelling, bruising, and a limited range of motion with the affected joint.
Fortunately, first aid for sprains is easy. Ice the area immediately, then compress it with a bandage until the swelling stops. It’s best to minimize activity to avoid further pain and discomfort. Over-the-counter medications such as ibuprofen can also help the victim manage aching.
- Treating nosebleeds
A bleeding nose may look horrible. However, they seldom indicate severe problems and commonly occur among adults and children.
Nosebleeds occurring near the front are easy to treat. Sit the victim up and pinch the nostrils close. After ten minutes, release the nostrils to see if the bleeding has stopped, but repeat the process if it hasn’t. Applying a cold compress on the nose bridge also helps lessen bleeding in a pinch.
- Setting a splint
Stabilizing fractures is critical before moving the victim. Never try to fix fractures yourself, as doing so may inadvertently cause more breakage.
First, carefully place the splint to support the joints on either side of the limb. Secure it with a bandage, tape, or cloth. However, avoid tying over the fracture. An improvised splint, like a book or plank, is just as good if you don’t have access to a medical one.
- Treating minor burns
You can quickly treat minor burns that have only damaged a small part of the skin’s outer layer. You can run cool water over the burn for up to 15 minutes until the pain resides. A cool compress is also a good alternative if running water isn’t available. Apply antibiotic cream or ointment to avoid infections before covering the affected area with a sterile gauze.
Pain relievers and aloe vera gel can minimize residual pain and discomfort. However, contrary to popular belief, under no circumstance should you apply ice as it may cause frostbite and do more damage than good.
- Treating frostbites
Frostbites occur when a body part freezes. Minor symptoms include tingly, whitened skin, while more severe cases may lead to swelling, peeling, and blistering. The affected area may also turn black as cells die.
Rush the victim to a warm area as quickly as possible and remove any wet clothing. You may also use warm water until the affected skin turns soft and regains color. Finally, wrap the affected area with clean gauze. However, seek medical attention immediately if symptoms worsen.
- Handling dog bites
Animal bites require urgent care due to the risk of rabies, especially if the animal’s teeth break through the victim’s skin. For example, handling dog bites may need the care of a professional to prevent them from worsening. However, you can also administer first-aid to give the patient time to go to the hospital.
If the wound isn’t bleeding, press on it to promote minimal blood flow and flush out germs from the dog’s mouth. However, you can stop the flow by applying gentle pressure if it’s already bleeding.
Wash the affected area with soap and water if the bite didn’t break the skin. Constantly monitor the wound for signs of infection, such as redness, swelling, and fever. It’s best to get post-exposure prophylaxis (PEP) for rabies if the victim hasn’t received vaccinations against the virus.
- Treating bee stings
While bee stings are minor inconveniences for many, it’s deadly for those allergic to bee venom.
Minor reactions require minimal treatment. All you need is to extract the stinger as soon as possible to prevent it from injecting more venom into the victim. Next, clean the affected area. Then, use a cold compress to alleviate irritation.
However, if someone’s having a severe reaction, acting fast is critical to saving their life. Call for emergency services, then extract the stinger immediately. Ask the victim or check their belongings for an epinephrine injector. Make sure to read the medication’s labels for instructions on how to use it to prevent anaphylaxis.
- Stopping a bleeding
You can manage most bleeding cases with first aid. First, determine the blood’s color and where it’s coming from to know how to stop the flow. Here are some tips to help you recognize the source.
- Capillaries: small amounts of trickling blood that usually stops on its own
- Veins: a consistent flow of dark red blood, ranging from mild to severe
- Arteries: excessive spurts of bright red blood leading to immediate shock and death if left unmanaged
If you have time, wash your hands, or wear disposable gloves. Doing so minimizes the chances of infection. Rinse the wound with water and cover it with a clean cloth. Even if the fabric becomes soaked with blood, never remove it, as doing so can interfere with the process.
Finally, apply direct pressure on the wound to encourage clotting and stop the bleeding. If you can, elevate a bleeding limb above the victim’s head to slow down blood flow.
- Performing a Heimlich maneuver
Also called abdominal thrusts, a Heimlich maneuver helps dislodge an object someone is choking on. The Heimlich maneuver isn’t just about squeezing the patient. There are specific steps you need to follow.
First, stand behind the victim and wrap your arms around their waist. Make a fist, placing it slightly above their belly button but below the rib cage. Then, grab your first with the other hand and swiftly pull backward and upward five times. Repeat the thrusts until they cough the object up.
For obese or pregnant people, perform thrusts around the chest instead. Moreover, if the choking victim is unconscious, lay them on their back and position yourself over them. Place your hand above their belly button and the other hand on it for support, then give upward thrusts.
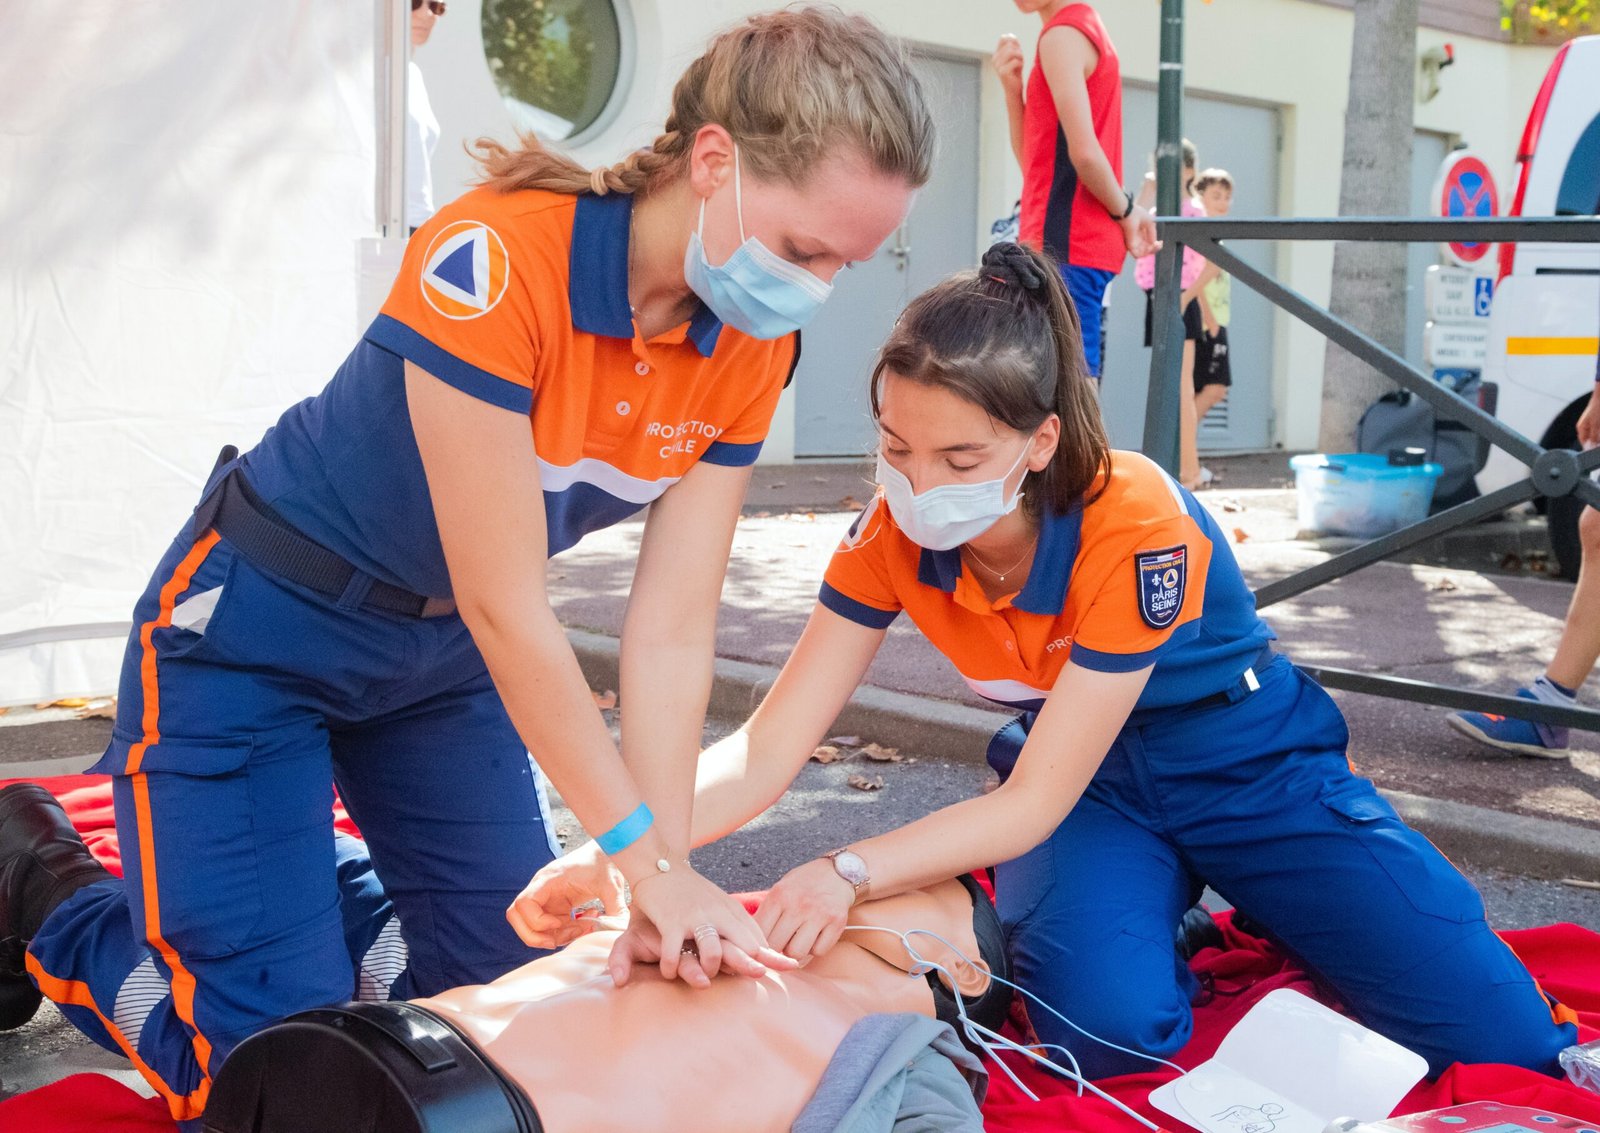
- Performing CPR
Assuming you have yet to receive training in performing CPR, it’s an exhausting but straightforward process. First, try waking the victim up. If they don’t respond after a few seconds, immediately call for emergency services. After that, place them on their back and check for breathing. If you don’t feel their breath, start CPR.
Place your hand between the victim’s nipples with the other hand on top for support. Push two inches deep and twice a second. After each thrust, lift your weight and let their chest rise naturally. After every 30 thrusts or compressions, provide two rescue breaths. Repeat the process until the victim responds or help arrives.
Be Prepared for Emergencies
It’s nearly impossible to predict accidents and emergencies. But you can gain control of any situation by knowing how to resolve them. Learning basic first-aid procedures equips you with the know-how to help keep injuries and conditions from worsening. Other than that, first aid can also teach you how to face high-pressure situations head-on.