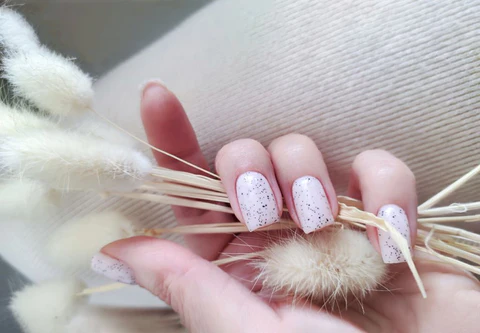
Applying nail polish is always easy. It is a thin viscous liquid and spreads smoothly on our nails. That is not so for gel nail polishes. They are much thicker, and even if you have the Best Gel Nail Polish, it can still be difficult to get a good finish. It is not the fault of the nail polish but rather a few mistakes along the way. Preparing your nails first is the key to a good finish on your cally gel nail polish. A good foundation will result in a smooth and clean-looking gel nail finish. Then, there are a few hacks you can use along the way to make it even better. Also, make sure you have a good quality gel nail polish as well as UV or LED light to cure and dry the nail gel.
Without further ado, let’s take a look at how to get the perfect manicure with gel nail polish!
The Importance Of Preparation
Like with paint on a wall, preparing your nails for a good gel nail polish manicure is crucial. Preparing the nails is not complicated – just a few steps, and if you do it right, your nails will look amazing and last longer than it has so far. Preparations require the following tools:
- Nail cutters
- Nail file and buff
- Cuticle tool and oil
- Acetone-based nail polish remover
Preparing Your Nails
It can be tempting to pick your favourite colour from the Cally Gel Nail Polish and start putting it on your nail, but we recommend resisting this temptation for five minutes more. And five minutes is all it takes to prepare your nails.
- First and foremost, cut and trim your nails to your preferred shape.
- Then file and buff the edge of your nail to ensure it is smooth. Use the nail buff to buff over the surface of your nail as well but be careful to do it just lightly.
- Then, push back your cuticles and cut off the extras. Once you’re done, massage in the cuticle oil, wash your hands thoroughly and dry them.
- Once they’re dry, use the nail polish remover with a cotton pad and wipe over the surface. It should be completely dry of any oils or moisturizer.
Also read: treatment for insomnia when you can’t sleep
With that, your nails are prepped and ready for the Best Gel Nail Polish. With the prep out of the way, let’s take a look at the best techniques to apply Cally Gel Nail Polish.
Applying The Nail Polish
For this step, you will need the following:
- Base Coat
- Gel Nail Polish
- Top Coat
- UV or LED light
A UV lamp is a must-have when you get a manicure using gel nail polish. Unlike other nail polishes, gel nail polishes are much thicker and will not dry without a UV lamp. So if you’ve ever fudged your gel nail manicure even a day after it’s done, now you know why.
The Process
Applying gel nail polish just needs a little bit of patience. Without patience, even the Best Gel Nail Polish in the world will not finish well. Here is a step-by-step process you can follow:
- Once your nail has been dried absolutely using the nail polish remover, you can begin with your manicure.
- First, you should apply the base coat to your nail. Base coats are slightly milky and off-white coloured. They will help the nail polish stick to your nail. It is best not to touch it to check if the base coat has dried. Instead, cure it under the UV lamp to make sure it is thoroughly dry.
- Now apply the gel nail polish. Make thin strokes and wipe off excess polish from the brush on the lip of the bottle. Make no more than a single stroke on each surface. For the thumb and larger nails, make a thin stroke on one side, and do the same on the other side. For the remaining in the middle, make a similar thin stroke. Do not dip too much for just one nail, and finish it in one dip.
- Dry your nails under the UV. Tap it very lightly, enough for dryness, not enough to leave a fingerprint, and cure it under the UV lamp if it is not dry yet.
- Now is your time to apply a second coating or layer if you need one. Some shades with lighter pigments may require a second or even a third coat. The key is to make sure each coating is as thin as possible and dried completely in between.
- The more layers you use, the longer you will need to cure it! You may need to dry it for a bit longer at the end of the second or third coating. You can, once again, tap lightly to inspect if it is dry. Before the final coat with the top layer, you need to be sure that it is completely dry.
- Finally, you can apply the top coat. With the UV lamp, it’ll be easy enough.
*Make sure you use the Best Gel Nail Polish of the highest quality to make sure the finish is equally good.
Make It Fun!
Add glitter of various shapes and jewellery to your nail after the last layer of gel nail polish and before you dry it. Stick it on the wet nail and then dry it under the UV lamp. At this point, you can get really creative and make nails more fun. You can also add little cut-outs, stickers, and other cute little accessories to your nail. Just remember to cure it and add a top coat!
The End
And…. That’s all there is to it! It is as easy as that. The key is in the prep and patience. It also might help to have good quality nail polish on your hands. Check out Cally Cosmetics for HEMA-free gel nail polish if you want it but are allergic and enjoy amazing manicures!


