

In today’s digital world, subtitles and captions are no longer a nicety—they’re a necessity. If you’re producing YouTube videos, Instagram reels, or corporate training videos, putting subtitles on your video makes it more accessible, increases engagement, and allows you to reach audiences worldwide. And the good news? You don’t have to be a professional editor to achieve this. Using CapCut Desktop Video Editor, putting subtitles and captions is not only a breeze, it’s actually quite fun.
CapCut also supports advanced features like text to speech, allowing you to generate voiceovers automatically without recording audio manually, perfect for creators looking to save time.
Why Subtitles and Captions Matter
Before diving into the technical steps, let’s quickly look at why subtitles and captions are worth the effort:
• Accessibility: Captions make your content inclusive to the hearing-impaired community.
• Engagement: A huge percentage of videos are watched with the sound off, especially on mobile. Subtitles keep viewers hooked.
• SEO Boost: Platforms like YouTube use subtitles for indexing, which can improve discoverability.
• Language Support: You can add translations and open up to a wider audience.
Whether you’re adding them for clarity, interest, or both, CapCut Desktop provides the tools to help you get it done.
If you’re producing lots of content quickly, using an AI video generator to create drafts can also help you organize your footage much faster.
Step 1: Import Your Video into CapCut Desktop
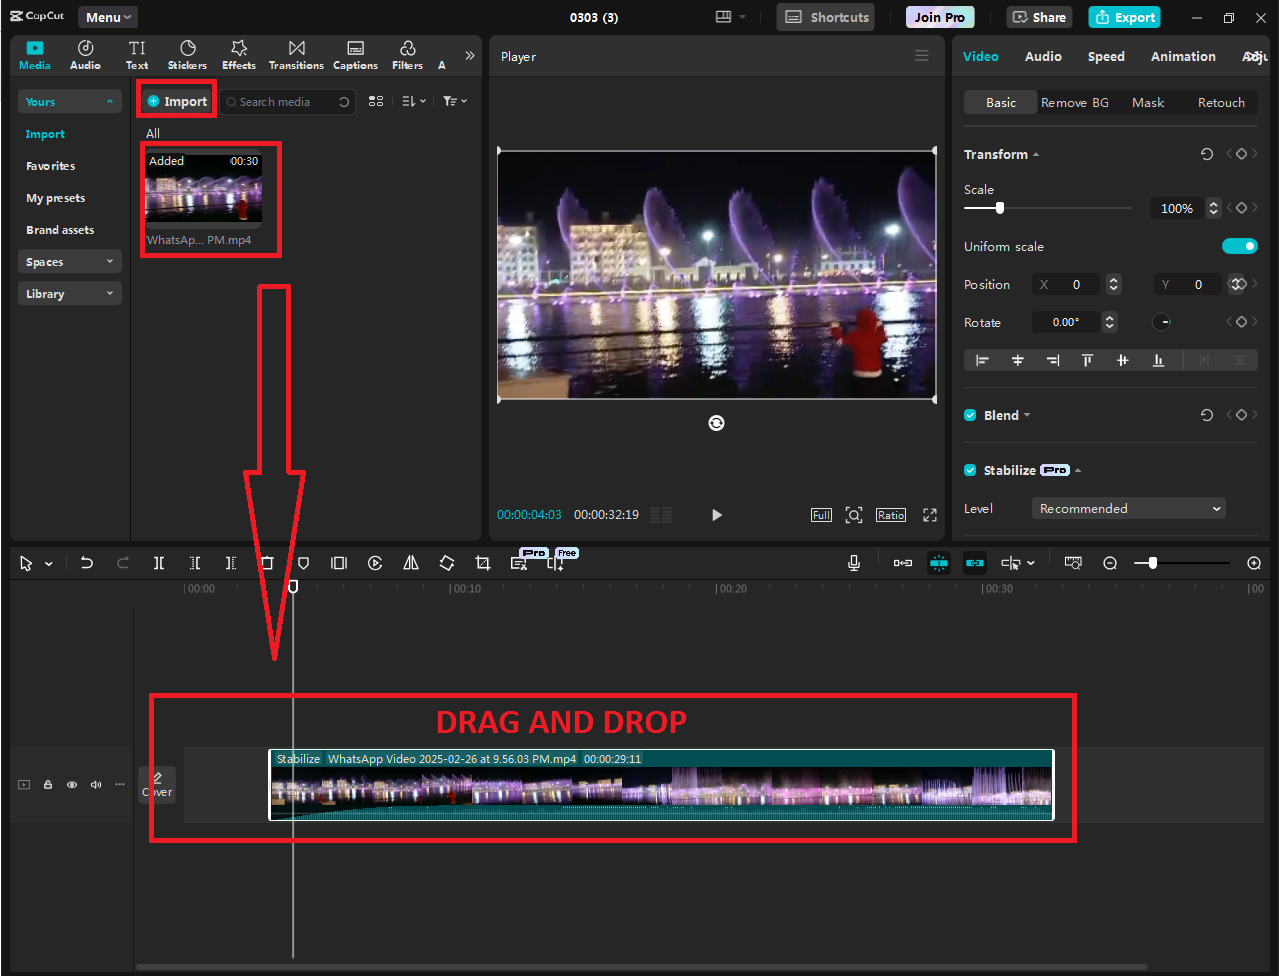
Getting your video into CapCut is the first step to being able to start editing. Open CapCut Desktop and tap “New Project.” Use the “Import” button to import your video files from your device. Drag your main video into the timeline. Ensure your video is tidied and cropped to the desired length—you don’t need to add subtitles only to have to re-edit and lose sync.
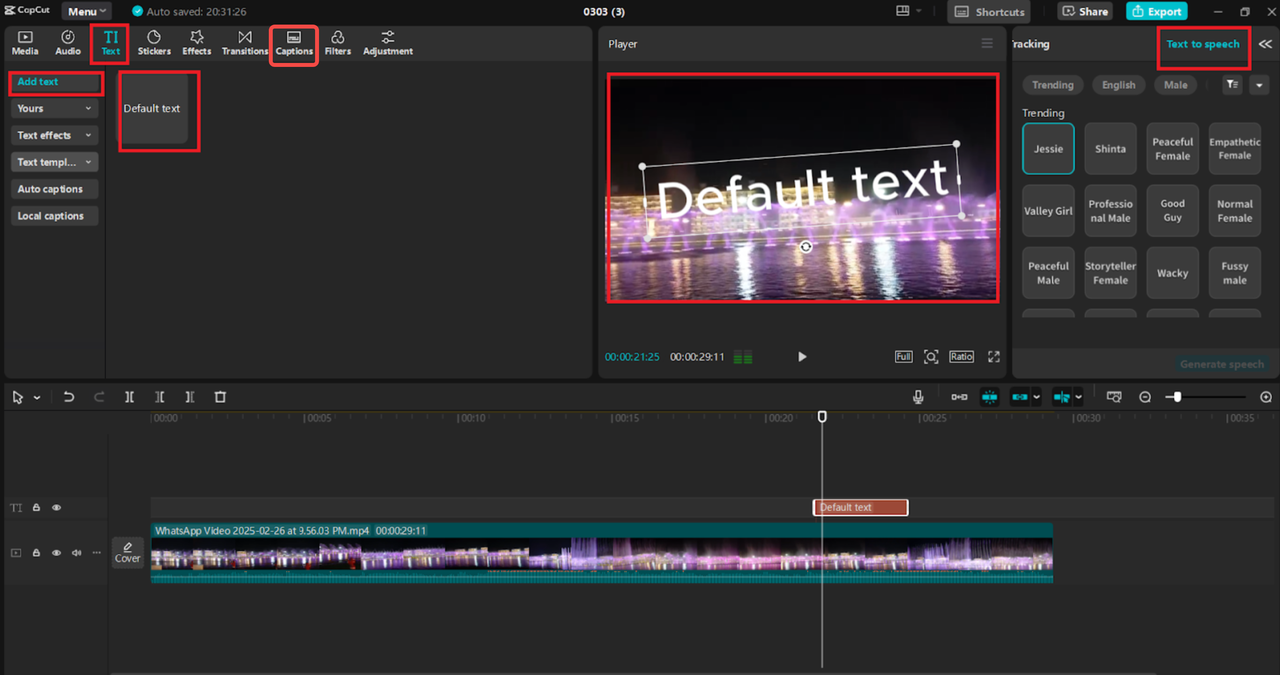
Step 2: Use Auto Captions (or Add Text Manually)
CapCut Desktop has two main ways to add subtitles:
Option 1: Auto Captions This is the simplest method to have subtitles on your video. 1. Click on the “Text” tab from the top menu. 2. Click on “Auto Captions.” 3. Select your language (e.g., English, Spanish, etc.) and click “Start.” CapCut will process your video’s audio and produce text with precise timing automatically. The outcome is a subtitle track on your timeline. You can double-click individual subtitle blocks to adjust the text or correct any mistakes.
Option 2: Manually Add Text If the audio is difficult to understand or you’re using silent video and simply want to add context, manual subtitles might be more suitable: 1. Go to the “Text” tab and choose “Default Text.” 2. A text box will show up—pull it onto your timeline where you’d like it to show up. 3. Type in your caption in the preview window. 4. Lengthen or shorten the duration by pulling on the edges of the subtitle block. This process is more time-consuming, but it gives you complete creative control.
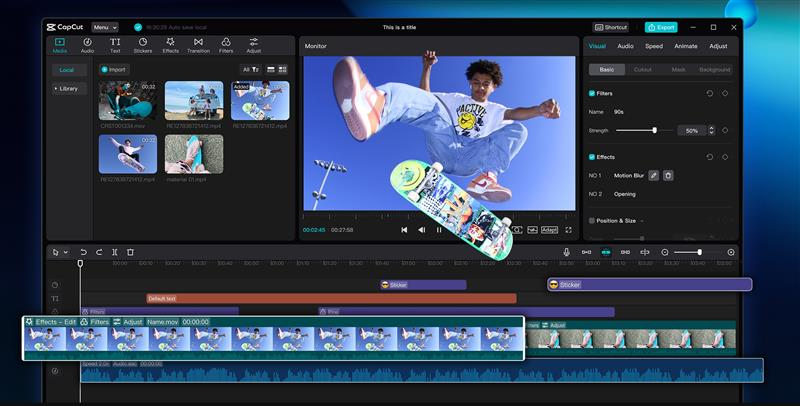
Step 3: Style Your Subtitles
Nobody enjoys reading white text on a messy background. Subtitle design that is good to read and complements your video’s look is easy with CapCut:
Choose any subtitle clip on your timeline.
Adjust using the Text Editor on the right side:
Font style and size Color and background Position and alignment Shadow or border for contrast
You can also select from pre-set caption styles within the text panel. Some are close approximations of popular social media subtitle designs, and others are cleaner and more sophisticated, ideal for film content. Pro Tip: Use sans-serif fonts such as Arial or Montserrat for easier reading. Avoid ornate scripts unless they are appropriate to the aesthetic of your video.
You can even experiment with CapCut’s voice changer feature if you want to stylize voices in your video, giving your subtitles a fun twist when syncing with different tones or characters.
Step 4: Sync and Time Adjust
Even with auto captions, it’s crucial to check that your subtitles are properly synced to the audio. Nothing distracts viewers more than subtitles that lag or appear too early.
Here’s how to fine-tune timing:
-
Zoom in on your timeline for better visibility.
-
Drag the subtitle blocks left or right to align with the corresponding dialogue.
-
Adjust the in/out duration by dragging the block’s edges.
If your subtitles sound too slow or too quick, adjust the timing manually until they sound natural.
CapCut lets you split subtitle clips, which is perfect for dividing long sentences into two readable pieces.
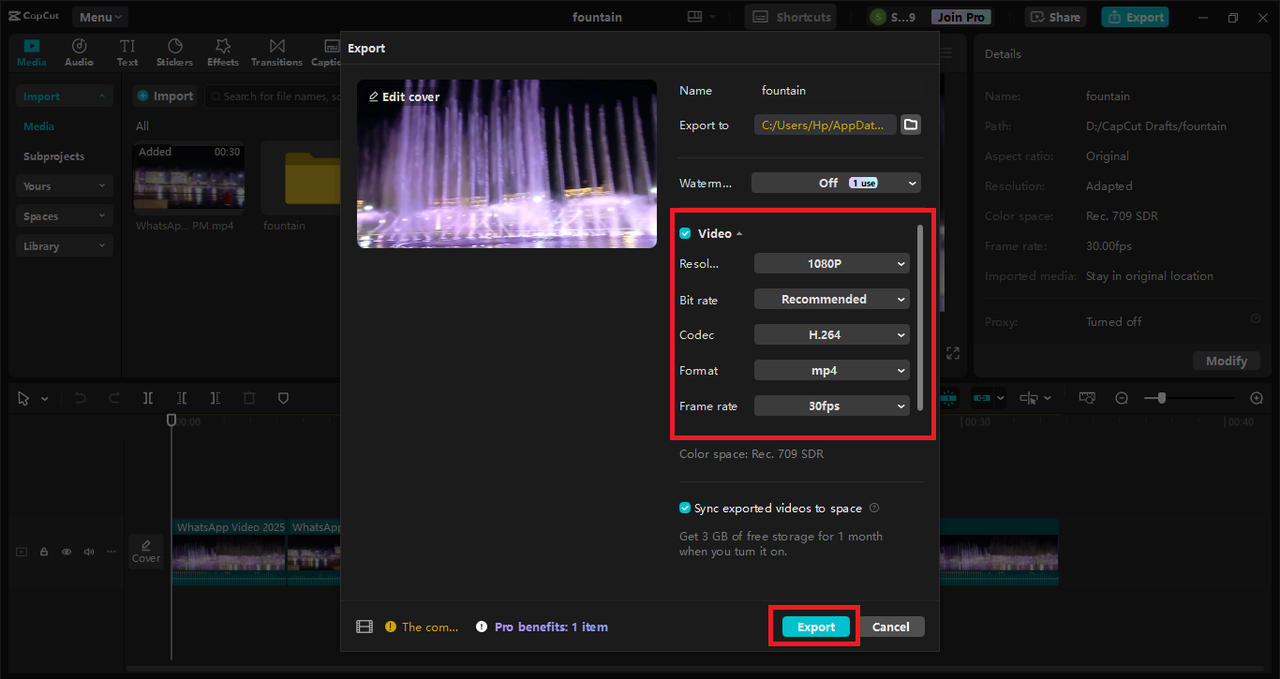
Step 5: Export Your Subtitled Video
Now that everything looks good and your subtitles are set, it’s time to export. Click the “Export” button in the top right. Select your resolution (1080p is default, but 4K is an option). Ensure that “Burn Captions into Video” is selected if you wish for hardcoded subtitles.
Pro Tips for Better Subtitles
Now that you’ve got the technical steps down, here are a few quick tips to elevate your subtitles even further:
-
Keep it short and sweet: Don’t overload each subtitle block. 1–2 lines max.
-
Time it right: Let subtitles stay on screen long enough to be read comfortably.
-
Don’t clutter: Ensure your text isn’t obscuring vital visual information.
-
Don’t overemphasize: Use bolding or italicizing for emphasis, but sparingly.
-
Translate to global audiences: If you aim to go global, copy your subtitle track and translate it manually or with the assistance of AI.
Final Thoughts
Subtitles and captions don’t simply repeat what’s said; they assist in telling your narrative. With CapCut Desktop, it’s made simple and easy, even for those who are new to the field. Whether you’re posting on TikTok, YouTube, or presenting to clients, including captions allows you to reach viewers more directly.