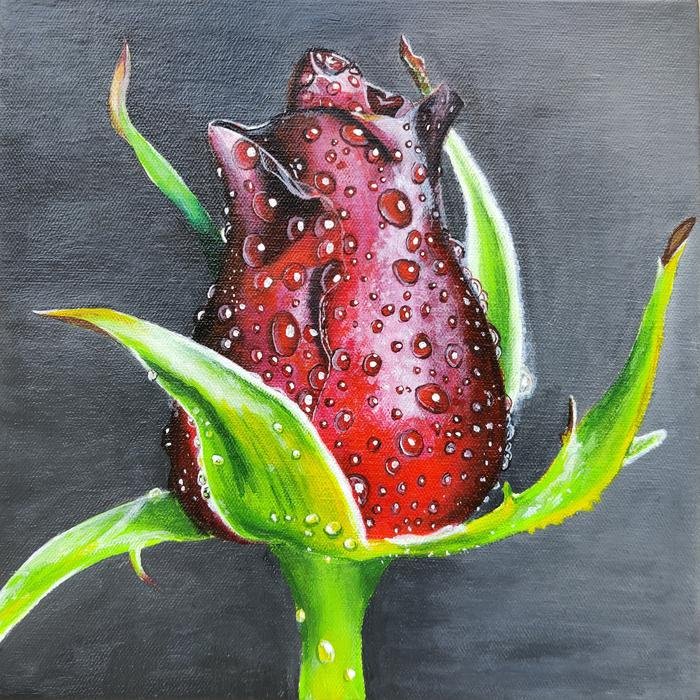
A red rose realistic acrylic handpainted painting is a beautiful and timeless piece of art that can add elegance and sophistication to any space. To create a realistic red rose acrylic painting, here are some tips:
- Prepare your canvas: Start by preparing your canvas with a layer of gesso. This will create a smooth surface for painting and prevent the paint from soaking into the canvas.
- Sketch the outline: Sketch the outline of the rose lightly with a pencil. Use reference images to guide you and ensure that your drawing is accurate.
- Paint the background: Paint the background of the canvas first, using a color that will complement the rose, such as a light green or blue. Allow the background to dry completely before moving on to the next step.
- Paint the base layer: Paint the base layer of the rose with a light shade of red, using a medium-sized brush. This will create a foundation for the rest of the painting and allow you to build up the layers of color.
- Add shadows and highlights: Add shadows and highlights to the rose to create depth and dimension. Use a darker shade of red to create shadows and a lighter shade of red or white to create highlights.
- Refine the details: Refine the details of the rose, such as the petals, stem, and leaves, using a small brush. Add veins to the leaves and use shading to create the illusion of depth.
- Allow to dry: Allow the painting to dry completely before adding any finishing touches.
- Varnish the painting: Once the painting is dry, apply a varnish to protect it from dust and fading.
By following these steps, you can create a beautiful and realistic red rose acrylic painting that will be a stunning addition to any space.
Achieving Depth and Dimension in Acrylic Painting
Achieving depth and dimension in acrylic painting is essential to create a sense of realism and bring your paintings to life. Here are some tips on how to achieve depth and dimension in acrylic painting:
Layering
One of the best ways to create depth and dimension is through layering. Start by applying a base layer of paint and then gradually build up the layers, adding darker shades for shadows and lighter shades for highlights.
Contrast
Contrast is also key to creating depth and dimension in acrylic painting. Use contrasting colors to create shadows and highlights. For example, if you’re painting a tree, use a dark green for the shadowed areas and a lighter green for the highlighted areas.
Perspective
Perspective is another important element in creating depth and dimension in acrylic painting. Use techniques like atmospheric perspective, which involves making objects that further away appear lighter and less detailed than objects that are closer.
Blending
Blending is another technique that can be used to create depth and dimension. Use a soft brush or a dry brush technique to blend the colors together and create a smooth transition between different shades.
Use of light
Use the direction of light to create shadows and highlights. If the light source is coming from the top, the top of the object will be lighter and the bottom will be darker.
Texture
Texture can also be used to create depth and dimension. Use different brush strokes or a palette knife to create texture on the surface of the painting.
Creating a Glaze Effect with Acrylic Paints
Creating a glaze effect with acrylic paints is a great way to add depth and dimension to your artwork. Here are some steps to create a glaze effect with acrylic paints:
Choose your colors
Select the colors you want to use for your glaze. It’s best to use transparent or semi-transparent colors, as they will allow the underlying colors to show through.
Prepare the surface
Prepare the surface you will be painting on by applying a layer of gesso and allowing it to dry completely.
Paint the base layer
Paint the base layer of your artwork using your desired colors. Allow the paint to dry completely before moving on to the next step.
Mix the glaze
Mix your glaze by combining a small amount of acrylic paint with a larger amount of glazing medium. The ratio should be about 1 part paint to 10 parts glazing medium, but this can vary depending on your desired effect.
Apply the glaze
Apply the glaze over the dried base layer using a soft-bristled brush. Use long, even strokes and make sure to cover the entire surface. The glaze should be thin and transparent.
Build up the layers
Allow the glaze to dry completely before adding another layer. You can add as many layers as you like to achieve your desired effect.
Add details
Once the glaze is dry, you can add details to your artwork using a smaller brush and thicker paint.
Using a glaze effect can create a beautiful and unique look to your acrylic paintings, adding a luminous quality to your artwork. Experiment with different colors and layering techniques to create your own signature style.


