How to Design Custom Cupcake Boxes Using the Latest Techniques?
Cupcakes are one of the most popular desserts that people love to enjoy on different occasions. Whether it’s a birthday party, a wedding ceremony, or any other event (Christmas or Halloween), cupcakes always have a special place on the dessert table. Despite much demand for cupcakes, bakeries always struggle to gain desired profit. The reason for this is that they don’t focus on the design and quality of cupcake packaging boxes. When it comes to packaging cupcakes, custom packaging boxes are an excellent choice to make them look more presentable and attractive. In this article, we’ll guide you on how to design custom cupcake packaging boxes using the latest techniques.
Step 1: Determine Eye-Catchy Box Size and Style
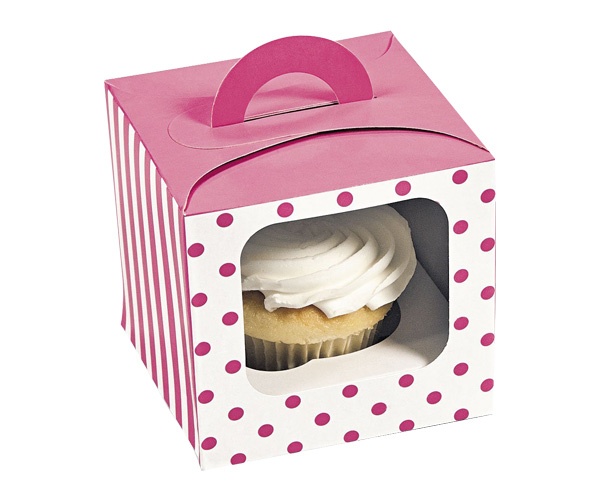
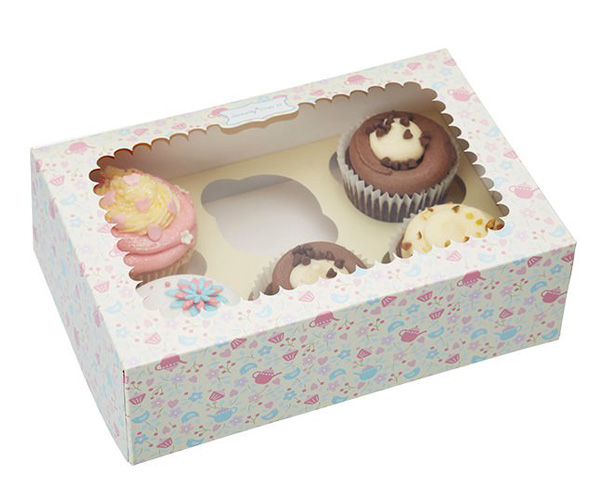
The first step to designing Custom Cupcake Boxes is to determine the size and style of the box. Depending on the number of cupcakes you want to pack, you can choose a single cupcake box or a multi-cupcake box. For example, if you’re planning to pack one cupcake, you can choose a small box with a clear window that showcases the cupcake’s design. Similarly, if you’re packing multiple cupcakes, you can choose a box with partitions that keep the cupcakes separate and prevent them from colliding with each other. Moreover, the latest die-cutting techniques make it possible for you to get the custom cupcake packaging of your choice. You can get packaging boxes of any shape, size, or style for your cupcakes using:
- Die cutting
- Gluing
- Scoring
- Perforation

Step 2: Choose The Durable Materials
The next step is to choose the material for your custom cupcake packaging boxes. There are different materials available in the market, including cardboard, Kraft paper, and corrugated board. Cardboard is an excellent choice for custom cupcake boxes as it is sturdy and can hold the weight of the cupcakes without collapsing. Other than that, Kraft paper is also a good option as it is eco-friendly, lightweight, and can give a rustic look to your boxes. Moreover, Corrugated board is the most durable option as it is thick and provides excellent protection to your cupcakes during transit. Depending on your needs and the designs of the boxes, you can select the best materials i.e.
- Cardboard
- Kraft
- Cardstock
- Bux board
- Corrugated paper
- Rigid materials
Step 3: Design The Box Creatively
Now it’s time to design the box in an artistic manner. After selecting long-lasting yet flexible materials and a unique configuration of boxes, you can design the cupcake packaging using these options.
Read More: Top 10 Best Things About Cosmetic Packaging Boxes
A. Add Inspiring Prints:
It is good to print the design on the box using digital printing, offset printing, or screen printing. For example, Digital printing is the most effective option for printing small quantities of custom cupcake boxes. Offset printing is a good option for large quantities as it produces high-quality prints. Additionally, Screen printing is a manual printing process that is ideal for printing on uneven surfaces. Hence you add inspiring prints to cupcake packaging with various printing processes. You can design packaging with different prints such as:
- Bakery name/logo
- Images
- 3d printing
- Holographic illustrations
- Drawings
- Patterns
- Intricate lines
- Typography
B. Use Gold/Silver Foil Stamping:
Foil stamping is a technique that involves the application of metallic foil to the surface of the box. It gives a luxurious and premium look to the cupcake box and can be used to highlight specific design elements. You can design patterns on the packaging of cupcakes. To make adorable cupcake packaging, you can use gold or silver foil on the borders of the packaging. Furthermore, you can also design the packaging by drawings eye catchy patterns with metallic foiling. It will give the most attractive look to the packaging boxes of cupcakes.
C. Embossing/Debossing:
Embossing and debossing are techniques that create a 3D effect on the surface of the box. Embossing raises the design elements from the surface, while debossing creates an impression of the design elements on the surface. Hence, you can use embossing or debossing options to design a bakery name or logo on the cupcake packaging box.

D. Design with Window Cutouts:
Window cutouts are a great way to showcase the cupcakes inside the box. You can choose from different shapes and also sizes for the cutouts and add a transparent plastic sheet to protect the cupcakes from dust and damage. Besides that, you can customize the shape and size of window cutouts according to your choice. Some bakeries add square or circular window cutouts. However, you can add cutouts that suit your cupcake packaging.
Step 4: Add Finishing Touches
The final step is to add the finishing touches to your custom cupcake boxes. The most important factor of finishing is the implementation of coatings. You can add glossy coating if you want shiny cupcake packaging. If you don’t want that, then you should add the matte coating. Furthermore, you can add ribbons, bows, stickers, or other decorative elements to enhance the overall look of the box. You can also add a personalized message or a company logo to make the box more memorable.
Conclusion
Designing custom cupcake boxes can be a fun and creative process. By following the above steps and using the latest techniques, you can create beautiful and Unique Custom Boxes that make your cupcakes stand out from the crowd. However, remember to choose the right size, material, and design elements that match the occasion and the theme of the event. Hence with a little creativity and imagination, you can create custom cupcake box packaging that leaves a lasting impression on your customers.


