Ready to jump into the fascinating world of resin art? Clear epoxy resin has been making waves in the art scene, allowing artists to create mesmerizing pieces that really pop. In this down-to-earth, step-by-step guide, we’re going to walk you through the process of making amazing art with epoxy resin. Whether you’re an experienced artist or just getting started, this guide will help you unlock the potential of epoxy resin for your creative projects.
Step 1: Gather Your Gear
Before you start your resin art adventure, make sure you have all the necessary supplies on hand. Here’s a checklist to ensure you’re good to go:
- A resin kit (make sure it’s meant for art projects)
- Safety gear (gloves, safety glasses, and work in a well-ventilated area)
- A wooden or canvas panel for your artwork
- Mixing cups and something to stir with
- A heat gun or torch to deal with air bubbles
- Pigments, dyes, or alcohol inks to add colour
- Silicone moulds (if you want to create 3D effects)
- FAQs: How do you make resin art step by step?
Step 2: Set Up Your Space
Creating resin art requires a clean and organized workspace. Lay down some plastic sheeting or a drop cloth to protect your surfaces. Make sure you’re in a well-ventilated room to keep those fumes at bay. Safety comes first, so wear your gloves and safety glasses throughout the process.
Step 3: Measure and Mix Your Resin
Follow the instructions on your epoxy resin for moulding kit to get the right measurements. Typically, you’ll need to mix equal parts of resin and hardener in a clean mixing cup. Stir them up thoroughly using your stirring stick. Take your time, and stir for at least two minutes to get rid of any pesky bubbles.
Step 4: Get Creative with Color
Now comes the fun part—adding some colour to your resin! You can use pigments, dyes, or alcohol inks to create your desired colours. Slowly mix them into your resin until you get the shade you want. Feel free to experiment with different colour combos to make your artwork truly unique.
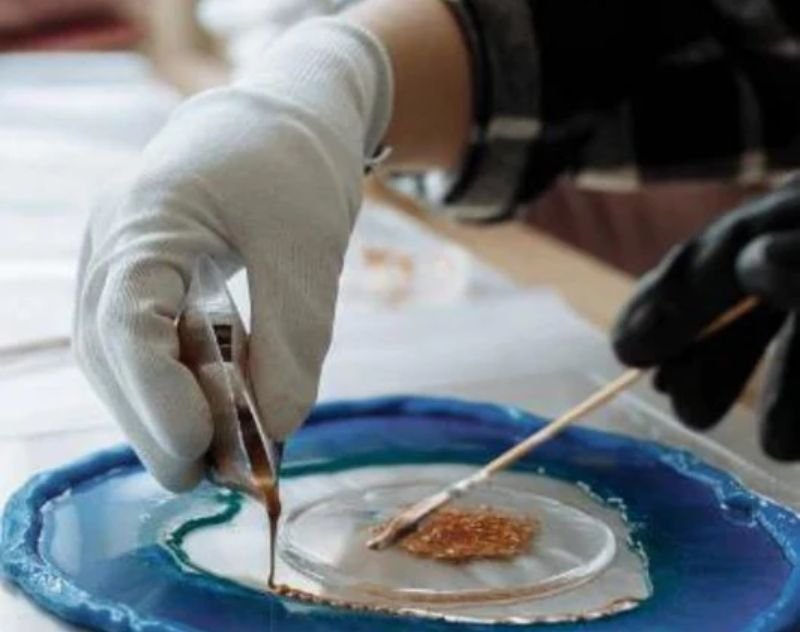
Step 5: Pour and Spread
Once your resin is the perfect colour, it’s time to pour it onto your canvas or into your silicone moulds. Start by pouring a small amount in the centre of your surface, then use a spreader to even it out. If you’re using moulds, pour the resin in carefully, layer by layer, to create intricate designs.
Step 6: Say Goodbye to Bubbles
After pouring, you might notice some tiny air bubbles trapped in the resin. No worries, we can fix that. Gently pass a heat gun or torch over the surface. The heat will make the bubbles rise and pop, leaving your artwork looking smooth and flawless.
Step 7: Add More Layers (If You Want)
If you’re going for a multi-dimensional effect, you can add more layers of resin and colours. Let each layer partially cure before adding the next. This technique can give your artwork depth and texture that will impress.
Step 8: Let It Cure
Resin art is a waiting game. Let your masterpiece cure in a dust-free spot for the recommended time specified in your resin kit’s instructions. Generally, it takes about 24-48 hours for epoxy resin to cure fully.
Step 9: Free Your Art (If You Used Moulds)
If you use silicone moulds, carefully remove your resin pieces once they’re fully cured. Take it easy to avoid damaging your beautiful artwork.
Step 10: The Final Touches
Your resin art is almost there! You can sand any rough edges, apply a clear topcoat for added protection and shine, or even incorporate other materials like wood or metal to take your piece to the next level.
Now that you’ve created an amazing piece of art using epoxy resin for moulding, it’s time to show it off. Whether you decide to keep it for yourself or share it as a gift, your resin art will definitely spark some conversations.
FAQs:
How do you use clear resin for art?
Clear epoxy resin is like the magic ingredient for creating artwork with a glossy, transparent finish. It can enhance and encapsulate all kinds of art, from paintings to sculptures and jewellery.
How do you start epoxy art?
Starting with epoxy art is all about getting your supplies together, prepping your workspace, mixing the resin, adding colours, pouring and spreading the resin, removing air bubbles, letting it cure, and adding any finishing touches you like. The possibilities are endless, so let your creativity run wild.
How do you mix epoxy resin for art?
Mixing epoxy resin for art is as easy as following the instructions on your resin kit. Usually, you’ll need to mix equal parts of resin and hardener, stirring them together for at least two minutes to get a good blend.
Using top-notch materials is crucial as you embark on your resin art journey. Craft Resin UK offers excellent resin kits perfect for all your artistic endeavours. With Craft Resin UK, you can trust that your artwork will be preserved in all its glory.
So, what are you waiting for? Dive into the world of resin art, let your creative juices flow, and craft your own stunning masterpieces with resin. Share your artwork with the world, and consider using Craft Resin UK for all your resin art needs. Happy crafting!